We have a D-Day of May 14th; this is the day the auditor will be coming in to do the air-tightness tests. Based on the results, we will receive a rebate under the federal ecoENERGY initiative. The cheque better be greater than the audit cost in the first place, which I think was around $180. But let's face it: we're not doing this for the ecoENERGY rebate, we're doing this for the long-term comfort of our house, our heating bills, and the quality of our life. The audit was just a bench-mark and proved that the air loss in our house was akin to leaving a door open 24/7, heating the great outdoors.
The facade of the house features a Widow's Peak that was added in the early 1900's. By adding this little feature, the look of the house changed dramatically from a typical French-Canadian farmhouse with the front porch running the length of the house, to a steep-roofed Victorian Gothic Revival-style. Unfortunately, in making these changes, major structural work was also done, not necessarily to the benefit of the house's main structure. It is due to this work that the facade of the house has bulged out by probably 4" or so.
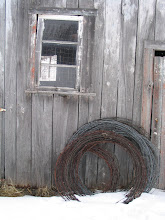
Here's a view of the window directly above the front door:
 Last weekend I removed most of the remaining interior pine paneling; I started to remove some of the old pine boards in behind, but wanted to go slow and steady as opposed to taking the Rambo approach and destroy everything in my sight. With warmer temperatures, things are getting easier because I simply pitch everything I tear down out of the window, and cut everything to wood-stove size outside with our trusty Dewalt circular saw. This invariably keeps the interior of the house much cleaner and easier to navigate around. It's enough to have to deal with piles of wood for the rebuilding, having to step over piles of broken wood full of nails becomes prohibitive and dangerous. The floor is sometimes very slippery; with a layer of sawdust, it nearly becomes a skating rink.
 So Eric was pretty crafty with the repair of the mega-rot. These boards are joined with halved lap joints and joined with screws and washers. The 2 metal stays in the above photo are screwed into the joists with 6-1/4" Spax screws. This wall is going nowhere. In fact, with periodically re-torquing of the stays, Eric managed to bring the wall back by a 1/4":
 It's not sophisticated, but there's the proof. We started at 2-1/2" and are now at 2-1/4". Slowly, we are bringing the wall back in. It's like architectural orthodontics.
 I thought I'd seen enough sawdust to last me a lifetime when we cleaned out the attic, but apparently there is no rest for the wicked. I must be very, very bad because but when I removed these boards, the sawdust was so tightly packed it didn't even fall out from between the studs. I just banged it out with my hammer, scooped it up with a dustpan and threw it right into the garbage. This quantity of sawdust in the vacuum would have warranted an immediate emptying of the canister. Sometimes, the manual method is the fastest.
 This last lovely photo shows a detail of the knotty pine, which if you are observant, you will already have noticed the 2x4 used as a shim to add the illusion of a straight ceiling. Nice try is all I can say. Under the knotty pine, we have the added bonus of a vapour barrier, moldy Gyproc, and tar paper. Hopefully by the end of April I will have taken down most of these layers. Removing the pine is simple, generally I just tug at one end and can rip the entire length of panelling down in one fell swoop, but the Gyproc is a different matter. Not only is it dusty, dirty, moldy, heavy, joined by rusty nails every few inches that need to be pulled out, it's back breaking because I have to work on a ladder or step-ladder. I will have a perma-kink in my neck by the time this job is done.
Eric is off the first week of May; hopefully during this week he will have managed to accomplish most of the work. I can just visualize us putting up the vapour barrier in the wee hours of the morning before the audit.
May 14th will be here before we blink - wish us luck is all I can add.